Lab preparation process
Ideally, the lab preparation process can be divided into two main categories, one is hardware setup and the other is software setup.
2.1 Hardware setup

In the hardware setup, the process starts with power plugs and LAN ports availability, tests for their functioning status, then all the computers will be set up with preplanned arrangement as per space layout, power and LAN ports availability. Afterwards, the switch/wifi router will be connected and all the client machines and server machines will be connected together via LAN cable or wifi. The server machines should have UPS backups as those will be carrying the resources and student’s data, artifacts, and will be of utmost importance
2.2 Software setup: Once the hardware setup is done, the next major preparation is the software setup which includes following steps:

OS (Ubuntu 18.04) Installation Guide
Preparation for Installation:
- Bootable USB drive/DVD with Ubuntu 18.04 ISO image loaded into it (installation media)
- Most reliable UPS or follback power source (available in school lab) along with main power source connected to clix server machine.
- Make sure that you have taken backup of existing data in the internal hard disk of the machine if there is any existing data.
- Do not connect internet to machine on which installation needs to be done (machine should be offline, detach LAN cable from machine)
Note: Before proceeding, for CLIx server machine setup, the following steps should be followed:
- Note down existing IP address of the CLIx server machine: (to list IP address use $ `ifconfig | less`)
- If the system already has CLIx Platform installed, Backup existing data from clix server machine.Please refer to “Steps to Download Complete Platform Data” section
- Format/Clean existing internal HDD of the server machine (following command assumes that internal HDD is detected at /dev/sda).
Command: “sudo dd if=/dev/zero of=/dev/sda bs=512MB count=2”
Shutdown the machine properly, if the machine remains in prompt display mode, hard shutdown the machine using power button on CPU, by long pressing it till machine gets shut down.
Steps for Installing Operating System Ubuntu 18.04 are as follows:
- Boot from USB drive (Bootable USB):
- Plug in a bootable device to the computer before starting it.
- Start your computer, press and release "F2" or ”F12” or ”Delete” function key (Button may vary machine to machine)
- Repeat the above step till the boot menu appears on the screen, one should not press and hold the key.
- After you land up to Setup Utility/Boot Manager, you have to select " Boot Device " as USB drive, by going into " UEFI Boot " by pressing " Enter" key and taking USB drive option to top using arrow keys (caution: here mouse pointer will not work, have to use the arrow keys on the keyboard.) [note: If hardware doesn’t support UEFI then select “Legacy Boot”]
- Save the changes using a key specified at the bottom of the screen e.g. " F10 ".
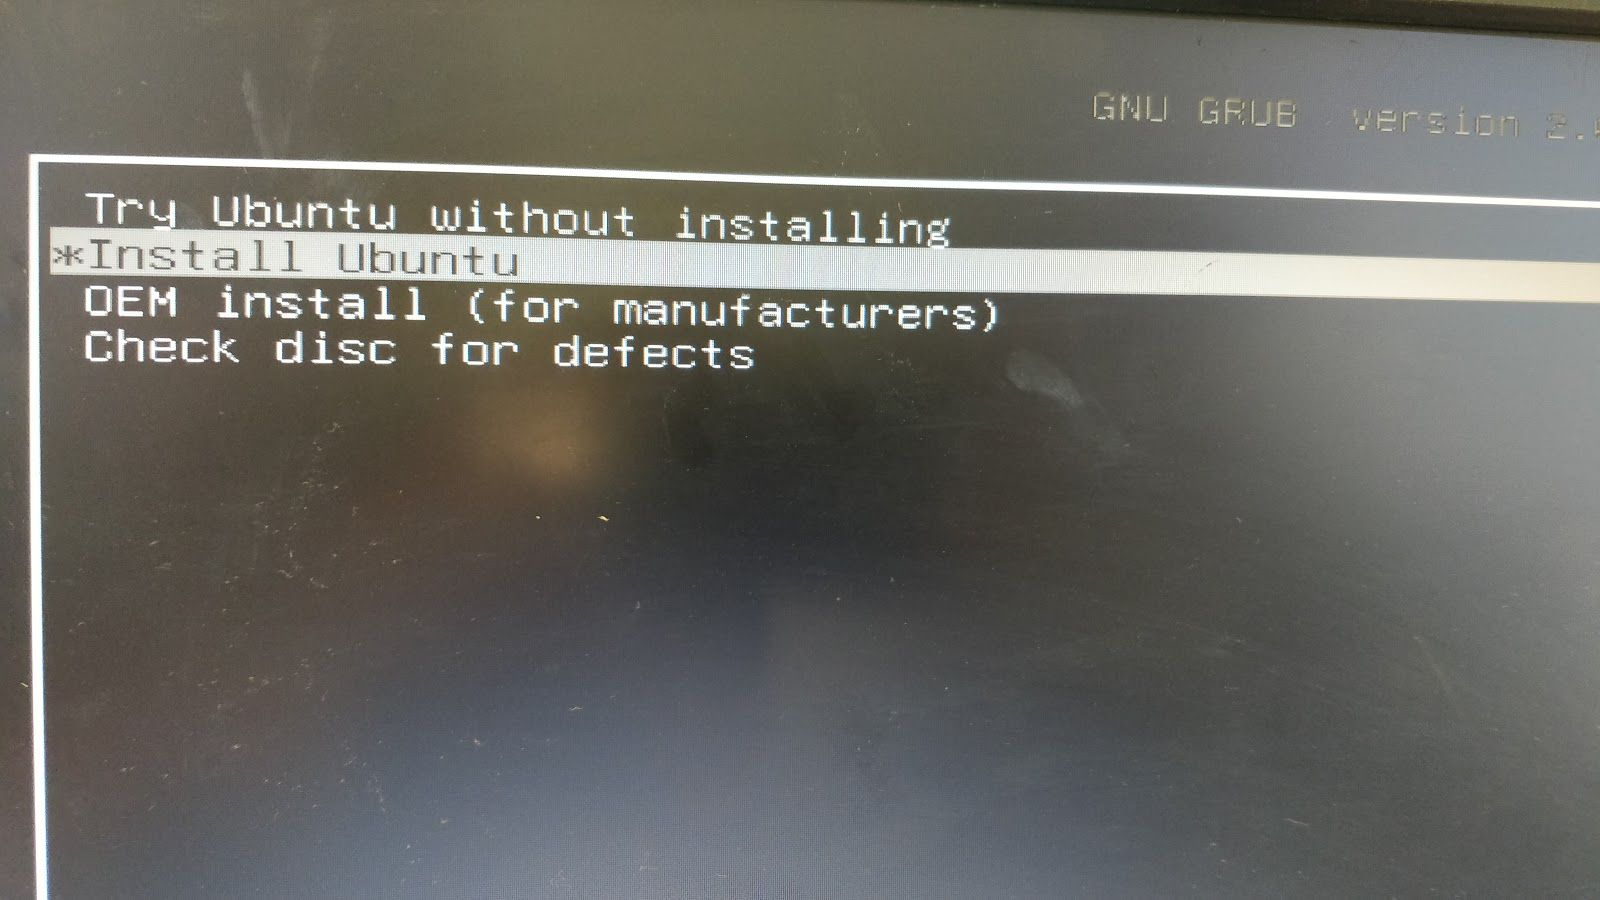
- Selecting Install option from menu
- Select “ Install Ubuntu ” and press enter
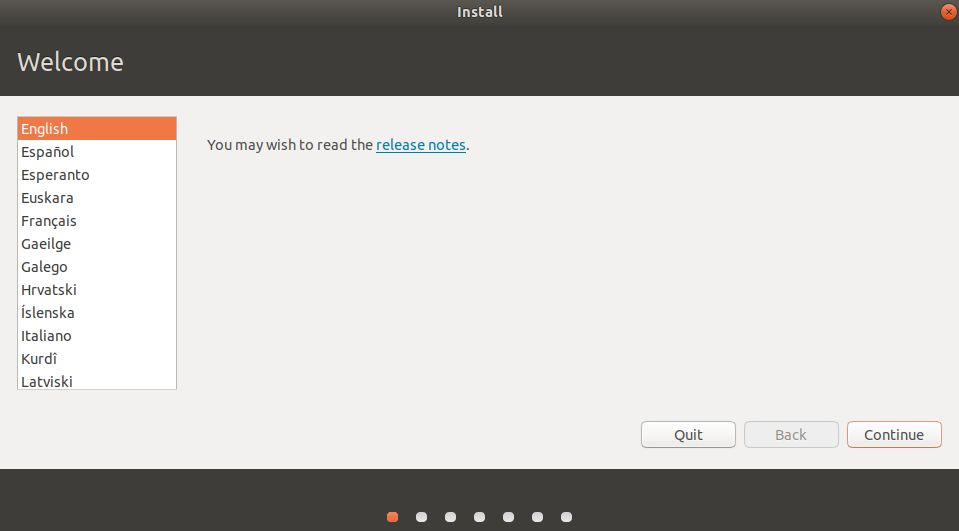
- Select Language:
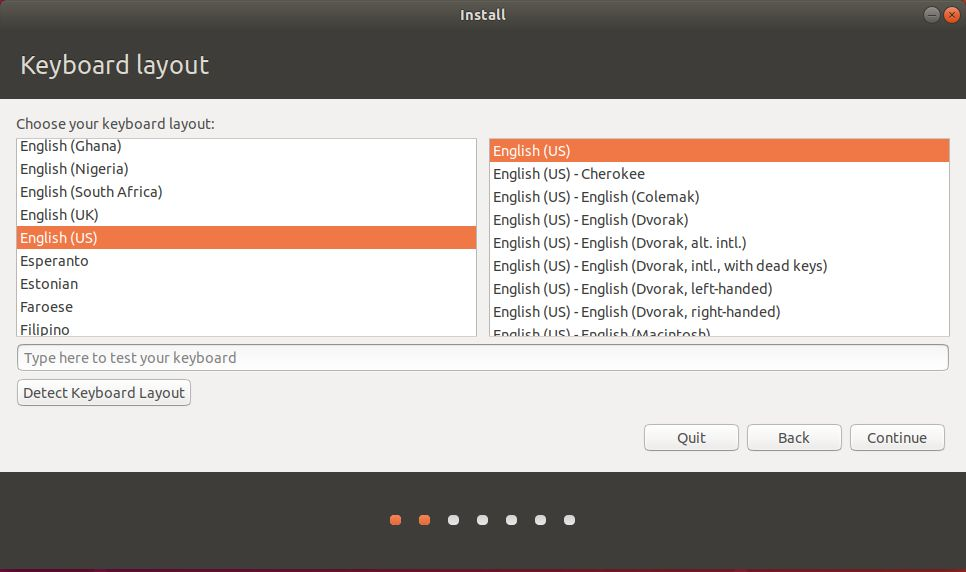
- Select Keyboard layout:
- Updates and Other Software:
- The following steps will be done in case of setting up client machine:
- Select “Normal Installation” in the first section of apps installation.
- Unselect the option “Download updates while installing Ubuntu”
- The following steps will be done in case of setting up client machine:
- The following steps will be done if the CLIx server is being setup:
-
-
- Select “ Minimal Installation ” in the first section of apps installation
- Select “ Install third-party software for... ” and unselect the option “Download updates while installing Ubuntu”
-
-

- Select Installation Type:
In case of client machine setup. Please follow below steps:
- Click on “Erase disk and install Ubuntu”.
- Click on “Continue”
In case of CLIx server setup, please follow these steps:
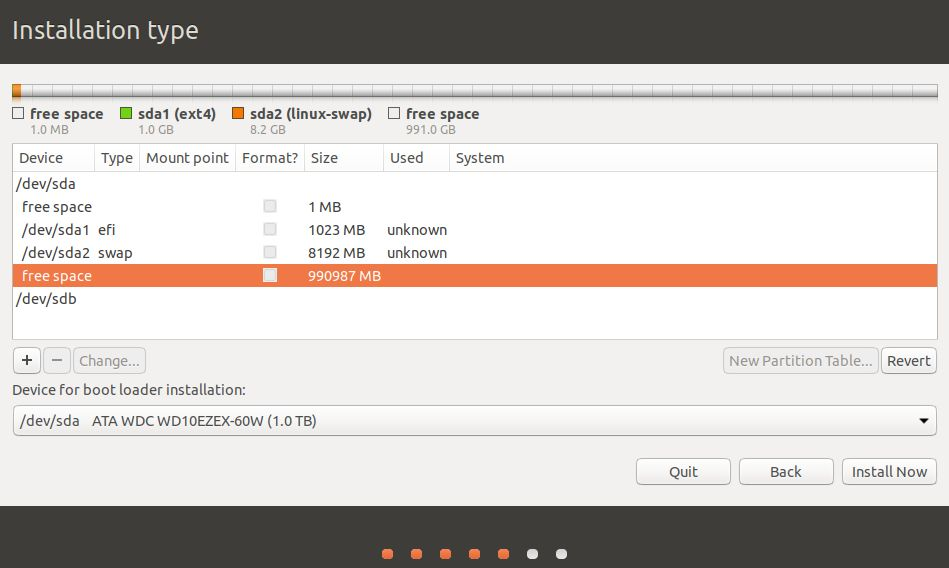
- This is an important step, here we want to have specific partitions as per our requirements, as this partition schema is used by automated script and we will follow it as a standard, so that all the CLIx servers in the school labs will have consistency and future maintenance, debugging will not be complex.
- To achieve the above and do the manual partitions select the "Something Else" option from the given menu and click on continue, as shown below.

- Disk Partitioning (Only for CLIx server setup):
This step will be followed only if CLIx server is being set up. In case of client setup, please skip this step.
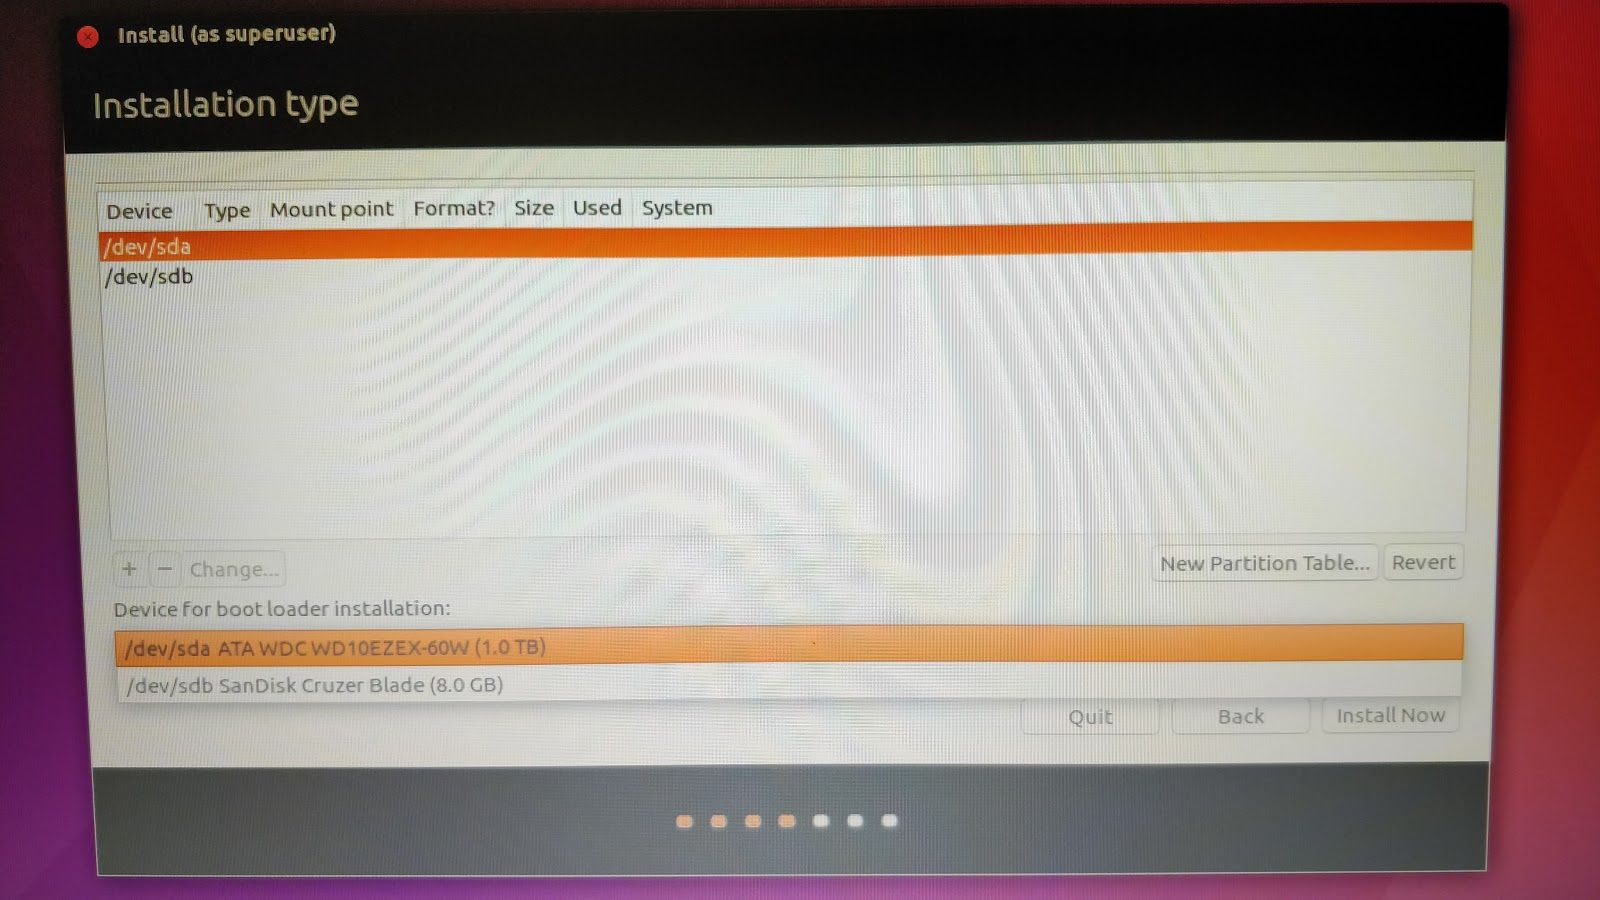
- Device for bootloader installation:
- Device for boot loader installation: "Select internal HDD" of server machine on which partitioning will be done (Eg: /dev/sda .... (1.0 TB))
- Select Partitioning Table:
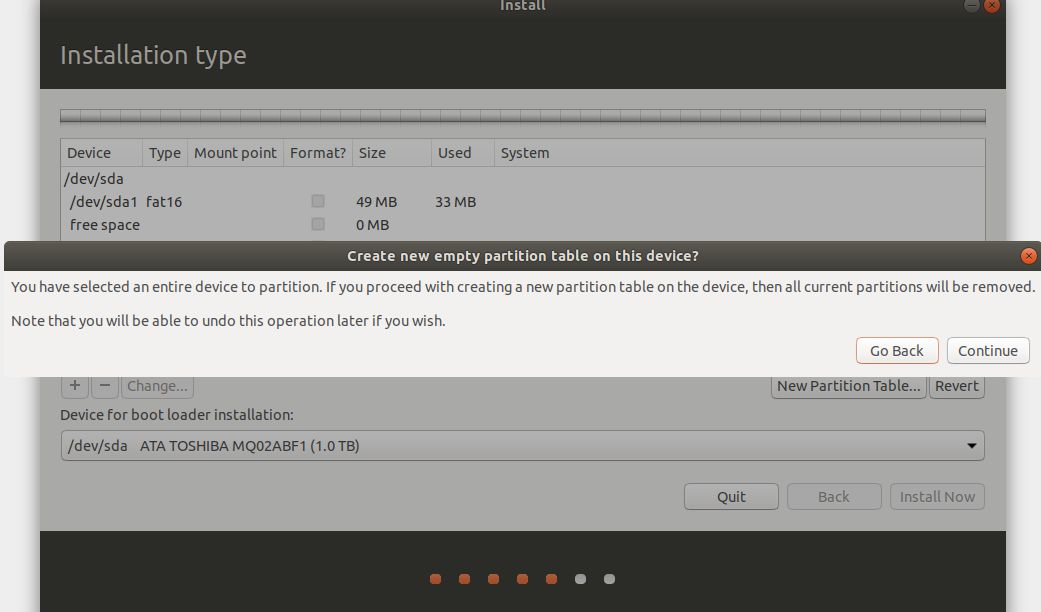
- Select disk space (device) for partitioning and installation, click on "New Partition Table" button

click on " Continue " in the warning popup
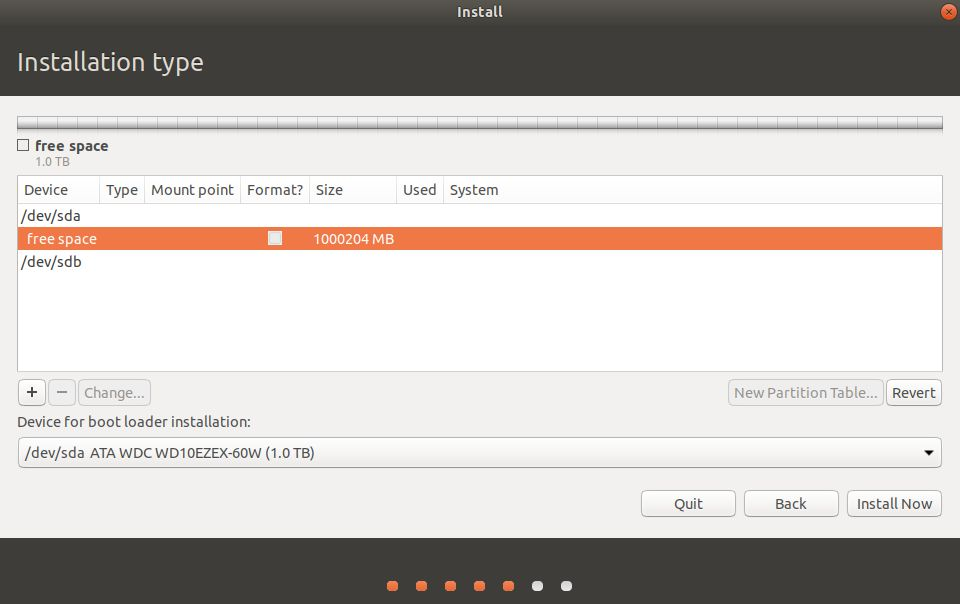
You will see the “ free space ” got created for the selected device as shown in the image here.
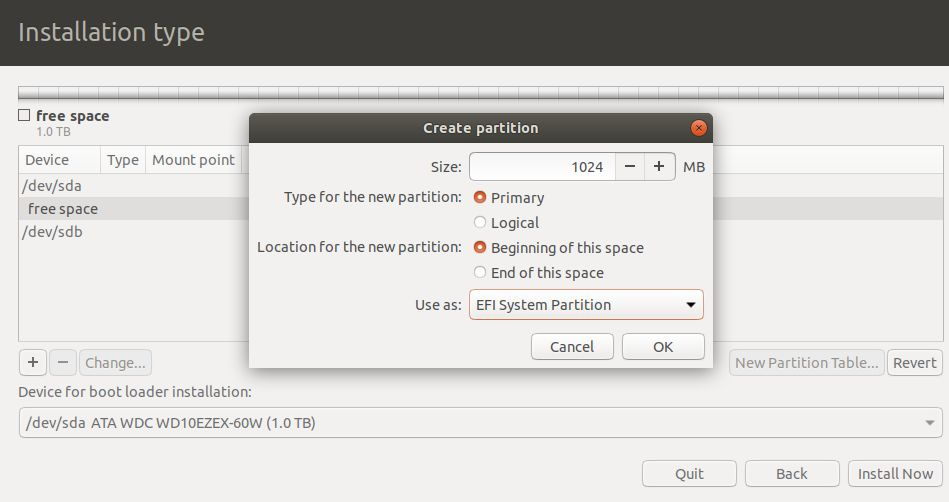
- Click on “ + ” button to add new partition as “ efi ”, in the pop-up of “create partition”, with the following values:
-
-
- Size = 1024 ;
- Type for the new partition = Primary ;
- Location for the new partition = Beginning of this space ;
- Use as = EFI System Partition
-
-

- Add following values for " swap " partition in "Create partition" window:
-
-
- Size = 8192 ;
- Type for the new partition = Primary ;
- Location for the new partition = Beginning of this space;
-
-
Use as = swap area

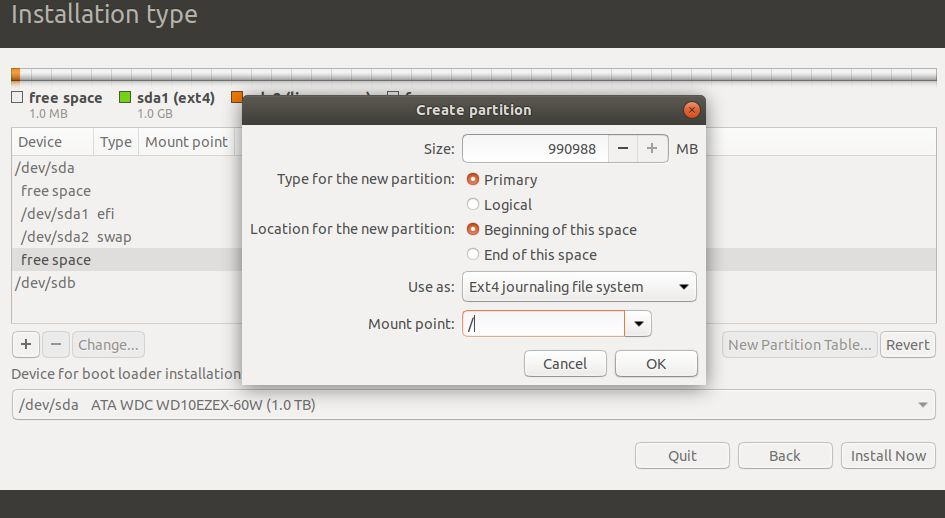
- Add following values for " / " root partition in "Create partition" window:
-
-
- Size = 990988 ; ( remaining free space)
- Type for the new partition = Primary ;
- Location for the new partition = Beginning of this space ;
- Use as = Ext4 journaling file system
- Mount Point = /
-
-